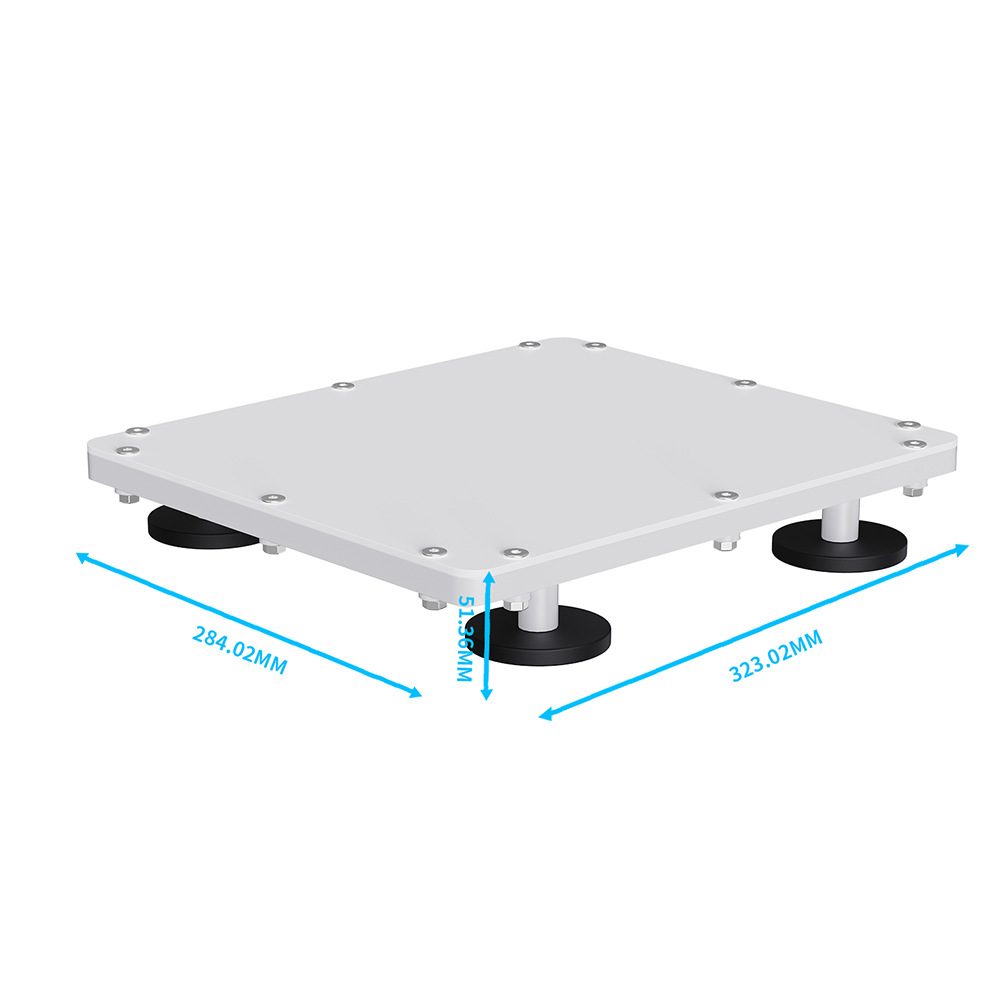
Starlink Mini is the first satellite dish small enough to actually mount on a car and use while driving. At 298 × 196 × 38 mm and under 700 g, it fits on virtually any car roof — and with the right accessories, you can set it up in under 10 minutes without drilling a single hole.
In this guide we cover everything: which magnetic mount to use, how to power the dish from your cigarette lighter, how to route the cable cleanly inside, and what speeds to expect on the road. All products shown are available on the OrbitGrip shop with fast international shipping.
Why Starlink Mini Is the Best Car Satellite Option
Until Starlink Mini launched, mobile satellite internet on a vehicle meant bulky, expensive phased-array dishes that needed dedicated roof frames and professional installation. Starlink Mini changed that completely.

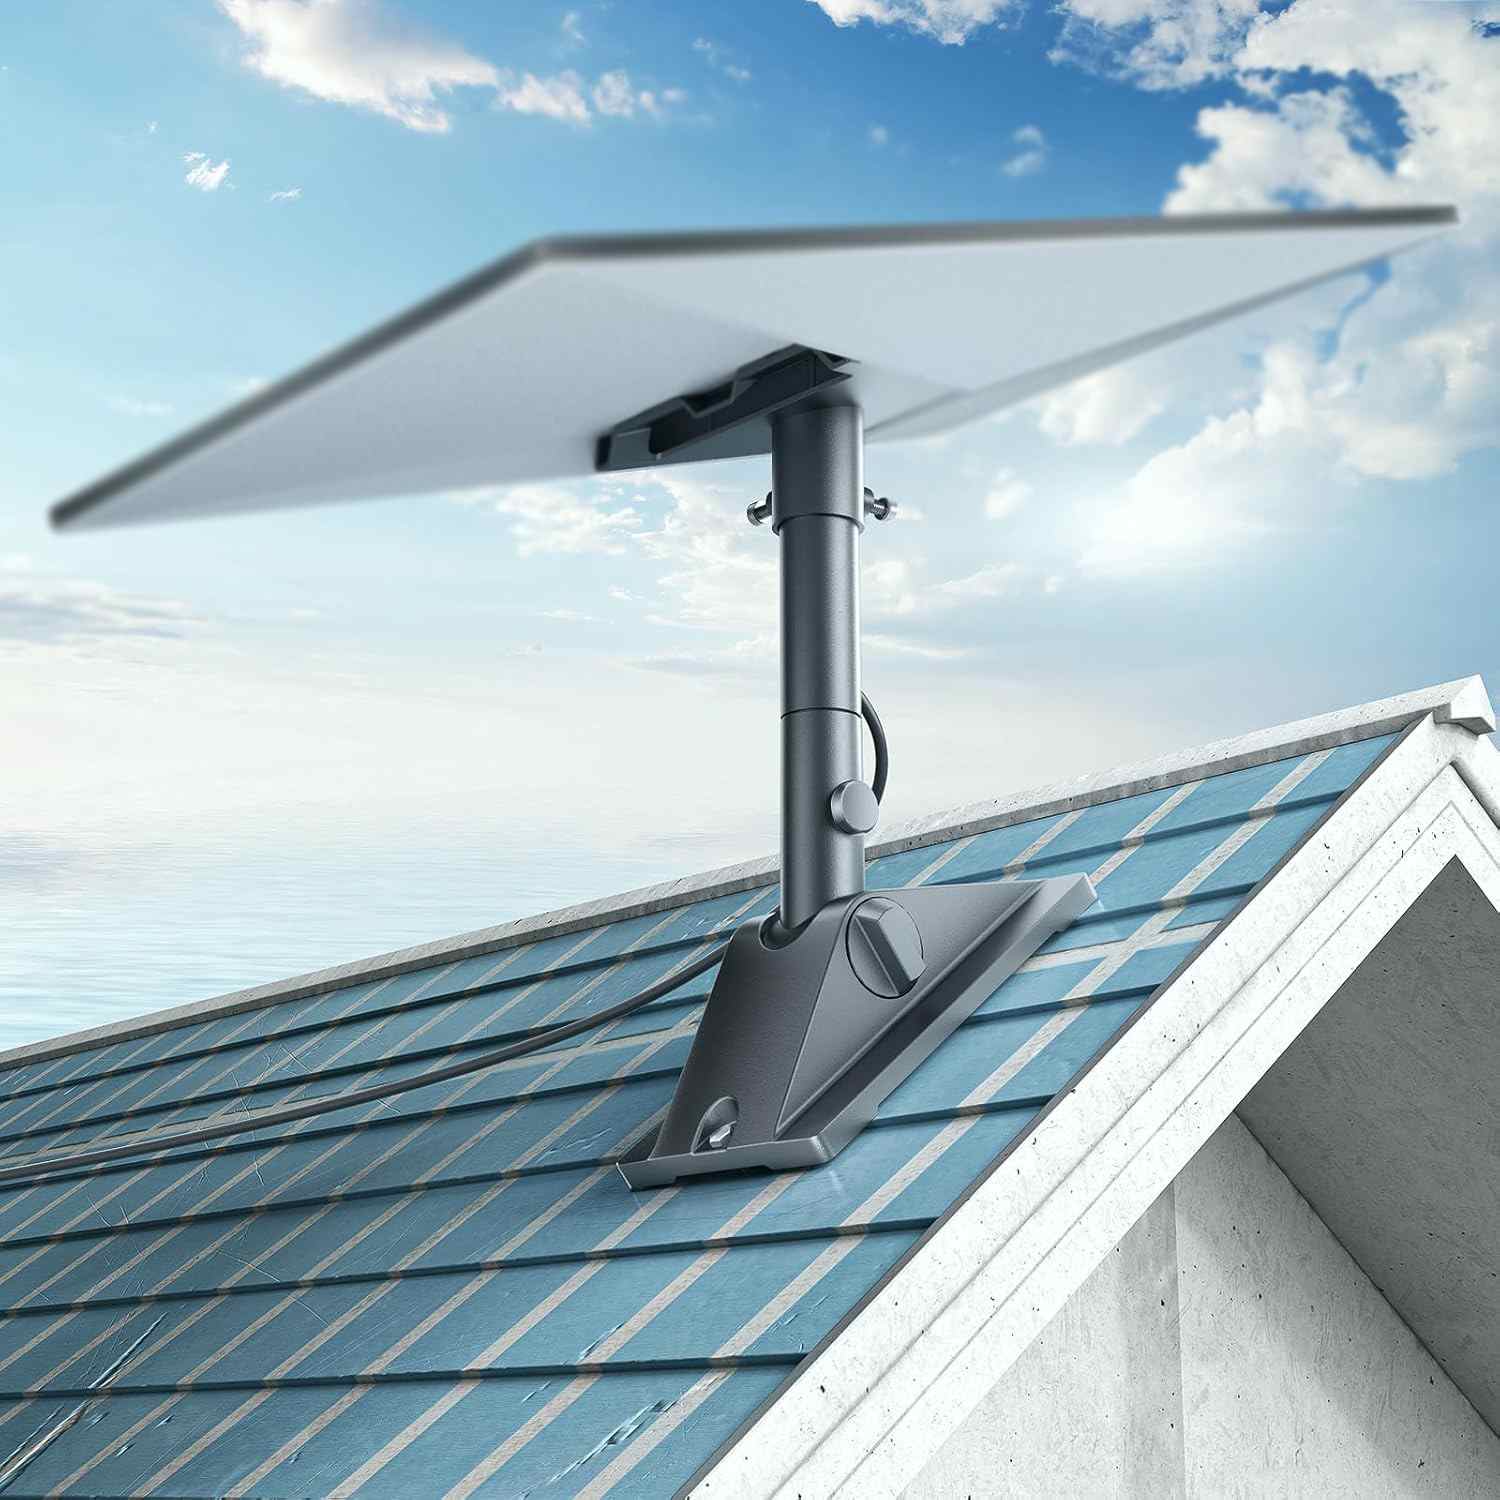
The Starlink Mini's flat profile (38 mm thick) makes it ideal for low-profile car roof mounting.
Here's how it compares to alternatives for vehicle use:
| Feature | Starlink Mini | Starlink Standard | Other 4G/5G Router |
|---|---|---|---|
| Dish Size | 298 × 196 mm | 589 × 383 mm | N/A |
| Weight | 680 g | 2.2 kg | ~200 g |
| Power Input | 25–30V DC | 100–240V AC | 5–12V |
| Download Speed | 50–200 Mbps | 100–250 Mbps | 20–100 Mbps |
| Coverage | Global | Global | Local cell coverage only |
| Drilling needed? | No (with OrbitGrip mount) | Usually | No |
What You Need (Parts & Tools)
For a clean, no-drill car setup you need two things: a magnetic roof mount and a 12V power adapter. Everything else (cable clips, cable routing) is optional but makes the install tidier.
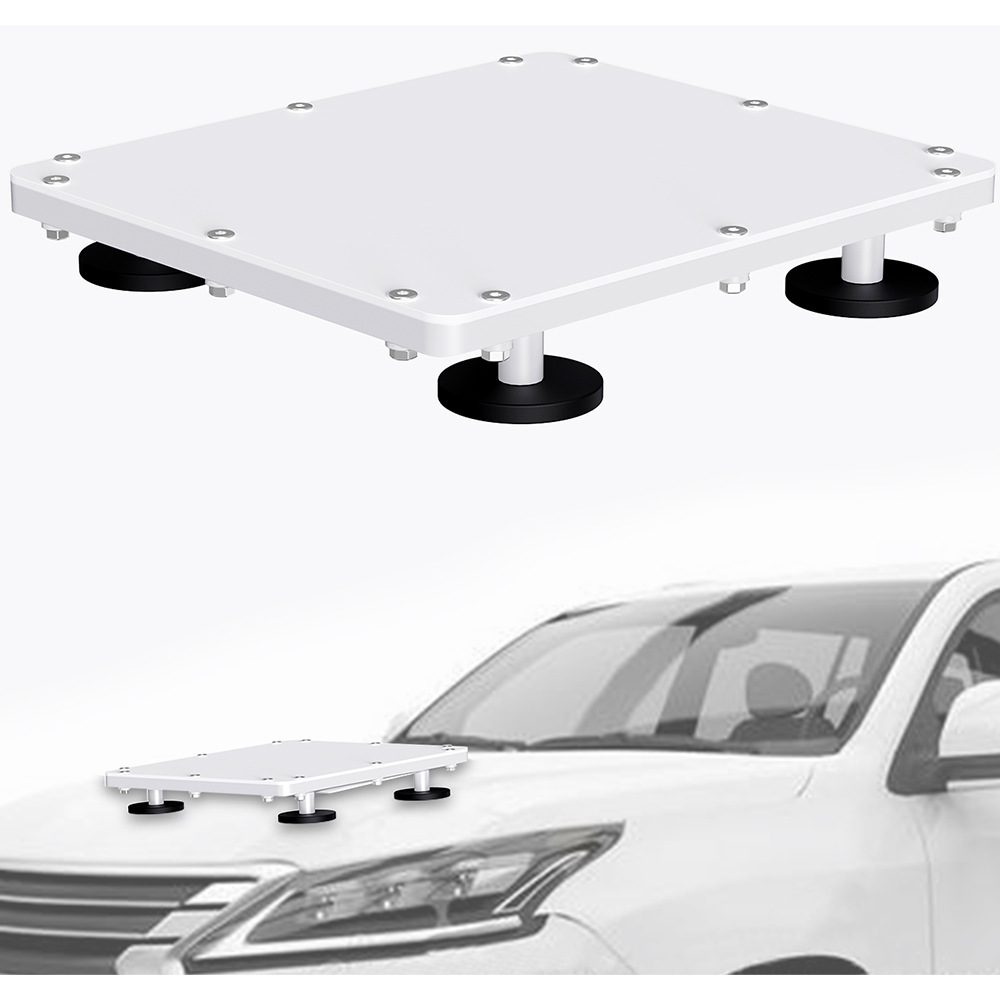
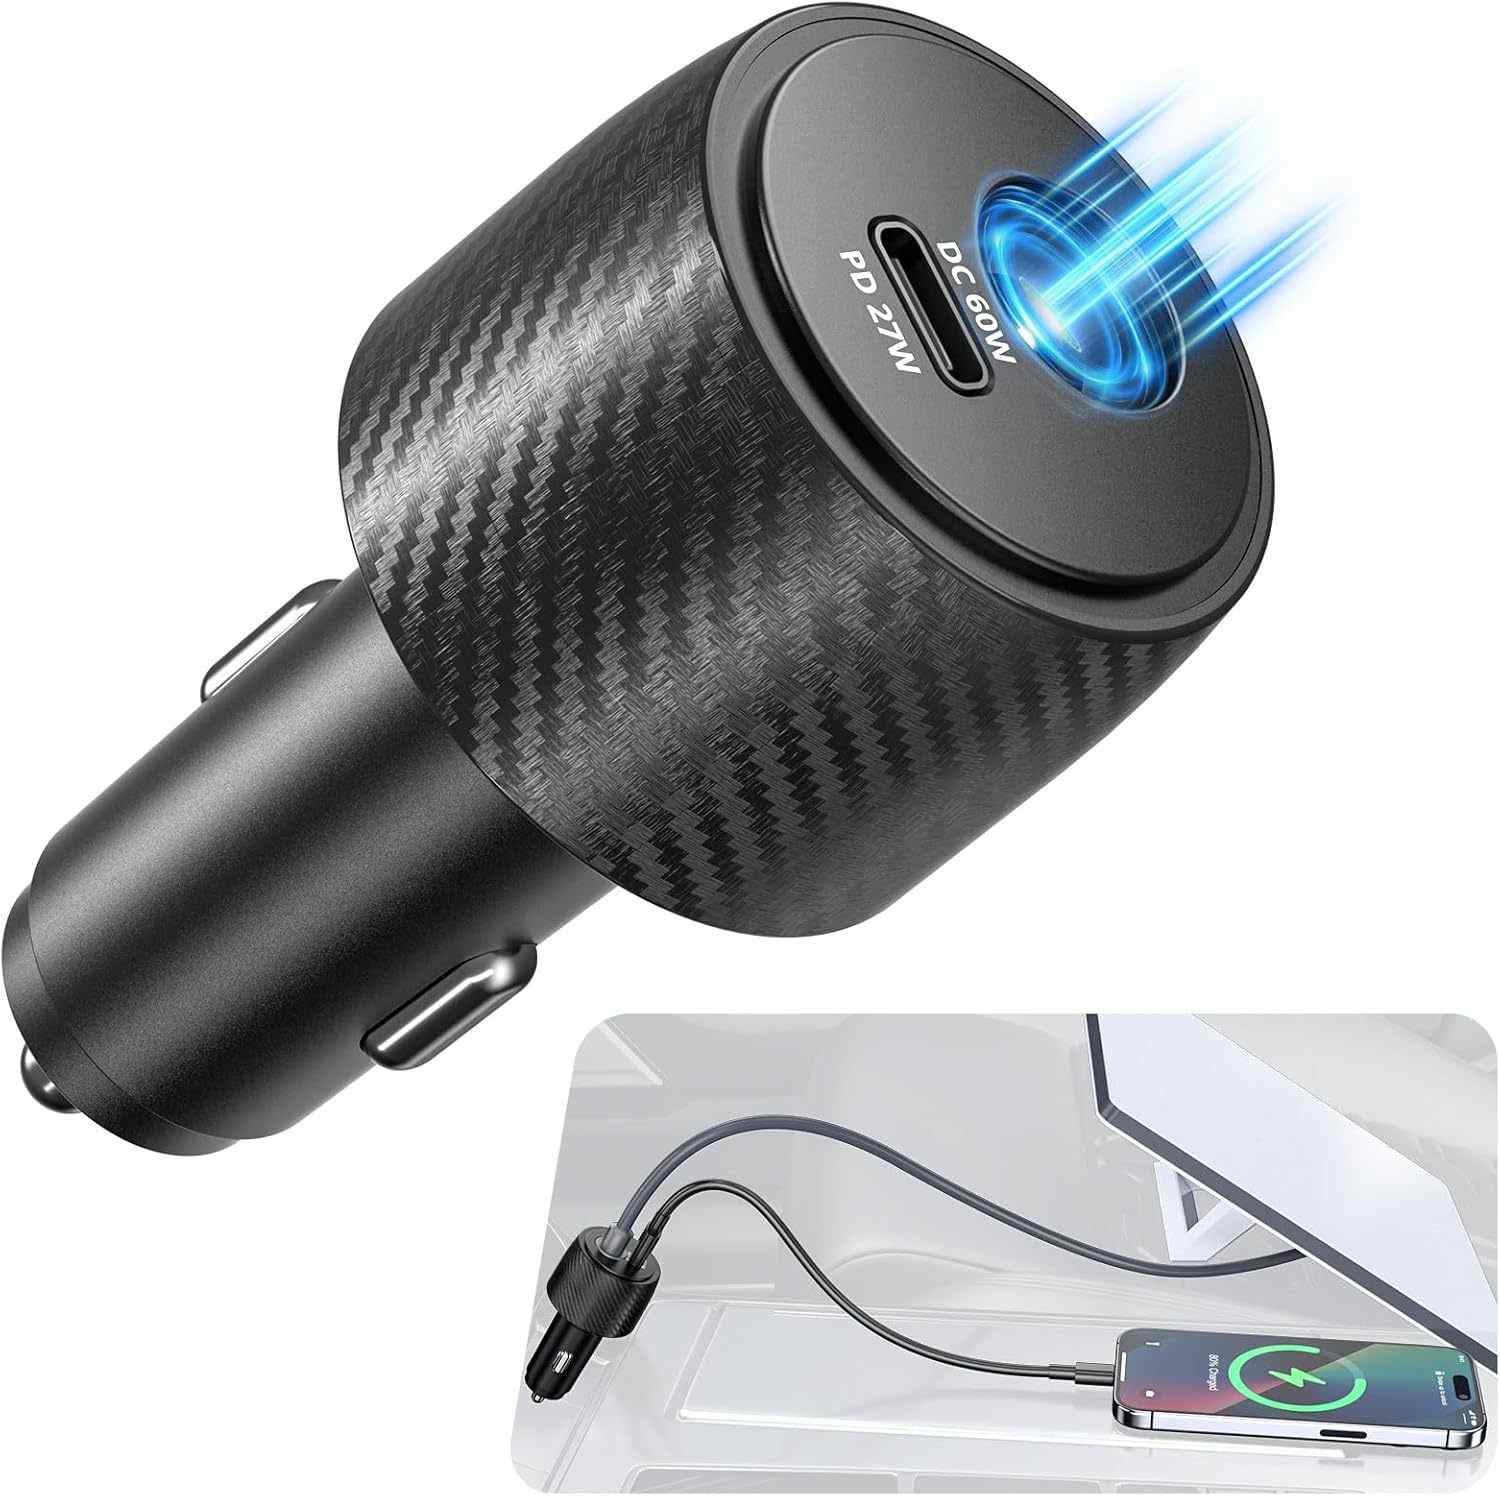
Left: MagMount Pro magnetic car mount. Right: PowerRover 3-in-1 DC power adapter.
Required accessories:
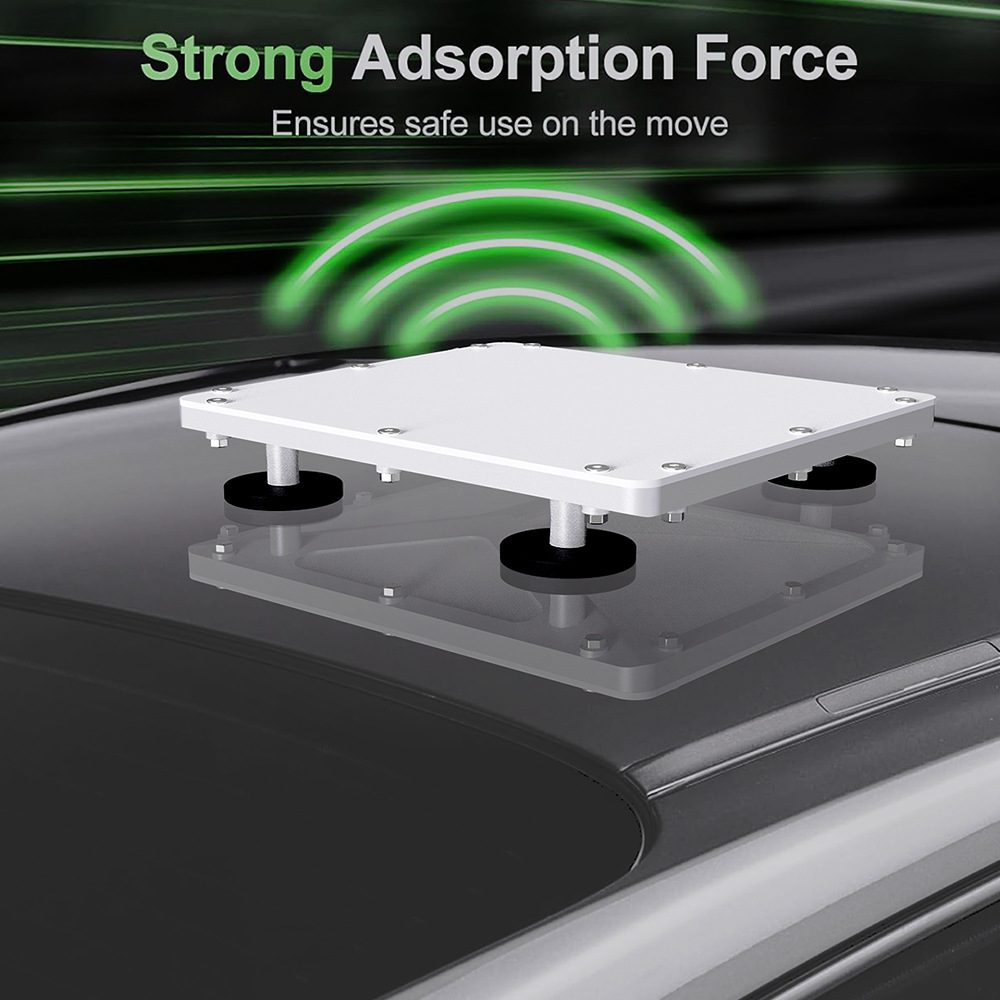
- OrbitGrip MagMount Pro — strong neodymium magnetic base with silicone pad, adjustable tilt arm, fits all Starlink Mini generations
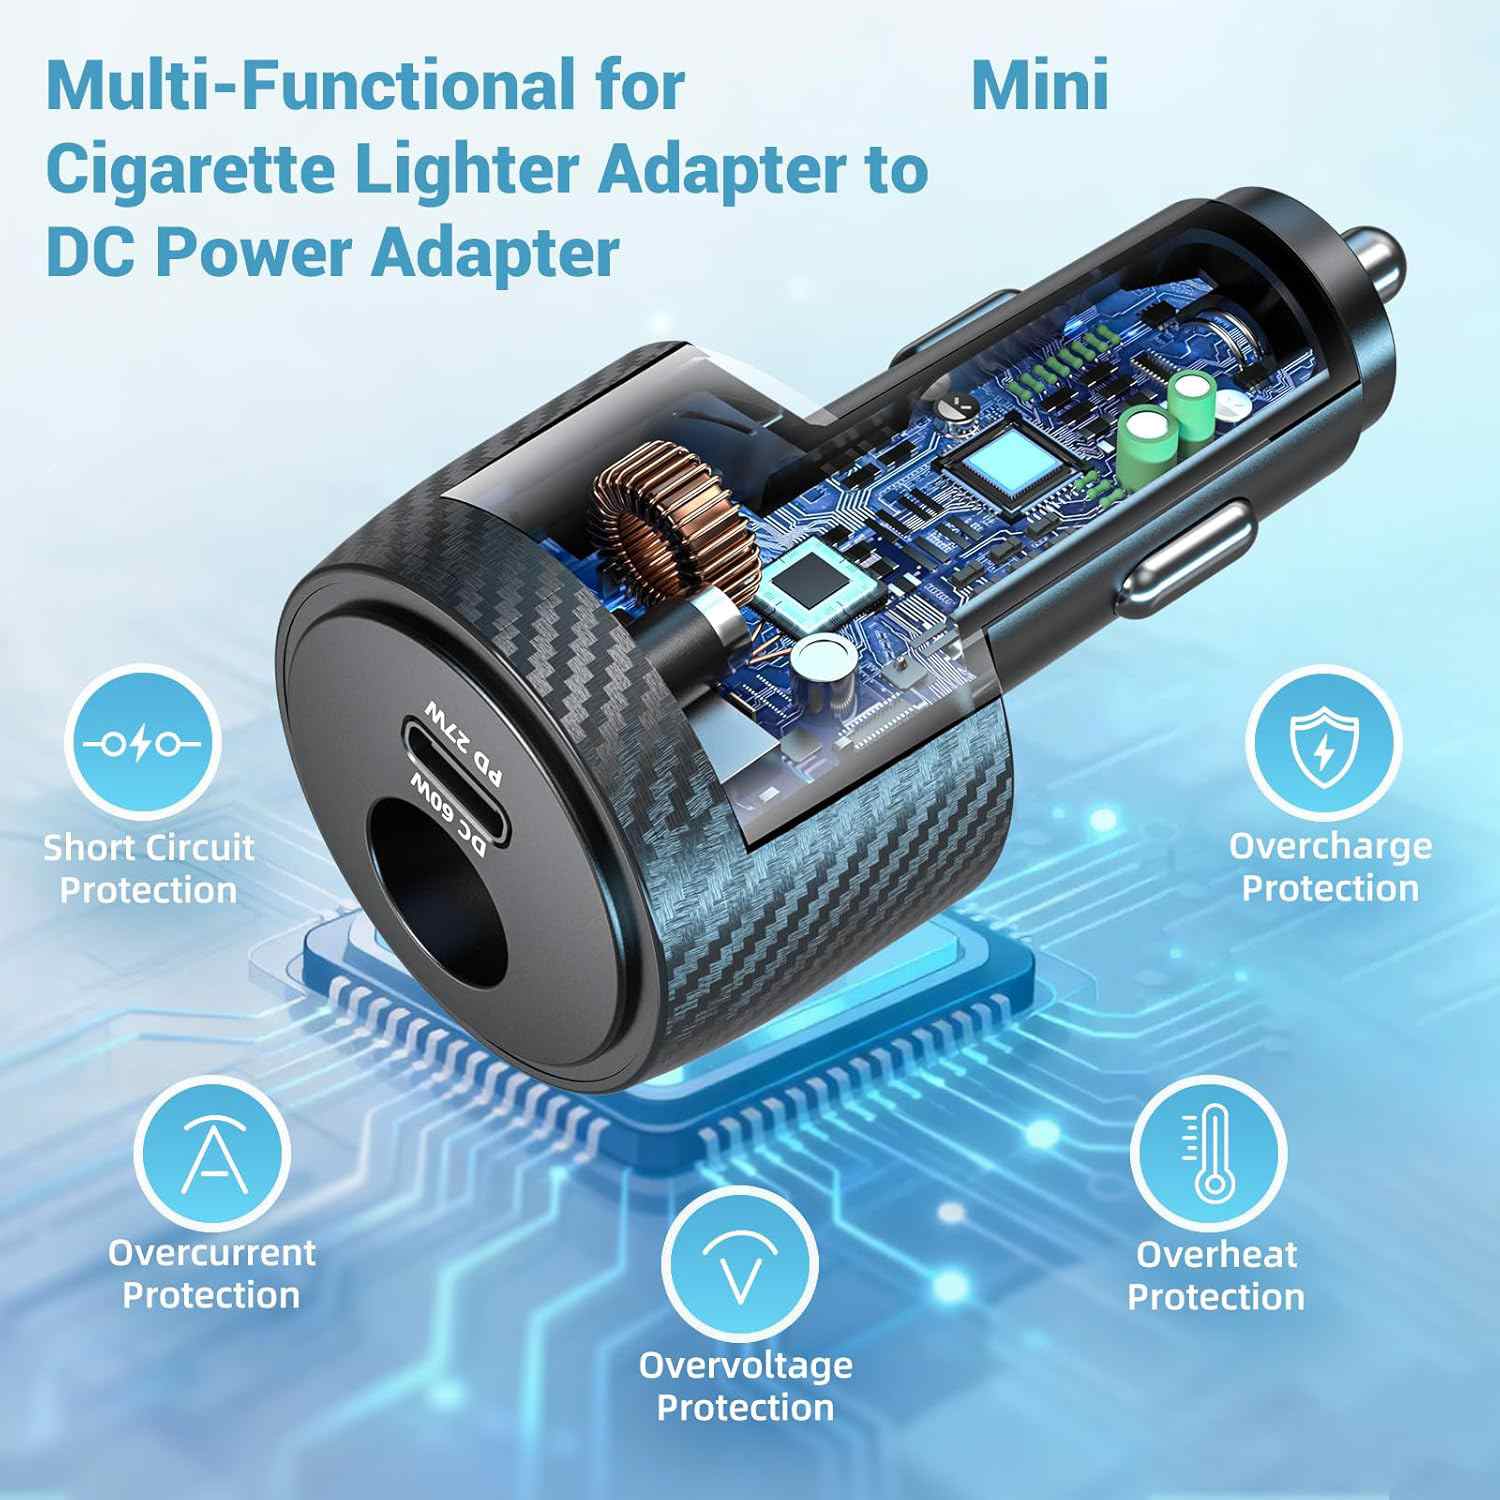
- OrbitGrip PowerRover 3-in-1 — 12V/24V cigarette lighter to 30V DC adapter with digital voltage display, cable included
Optional (recommended):
- Cable routing clips (included with MagMount Pro) — keeps the cable along the A-pillar
- Felt liner pad (included) — extra paint protection on vinyl-wrapped or delicate paint surfaces
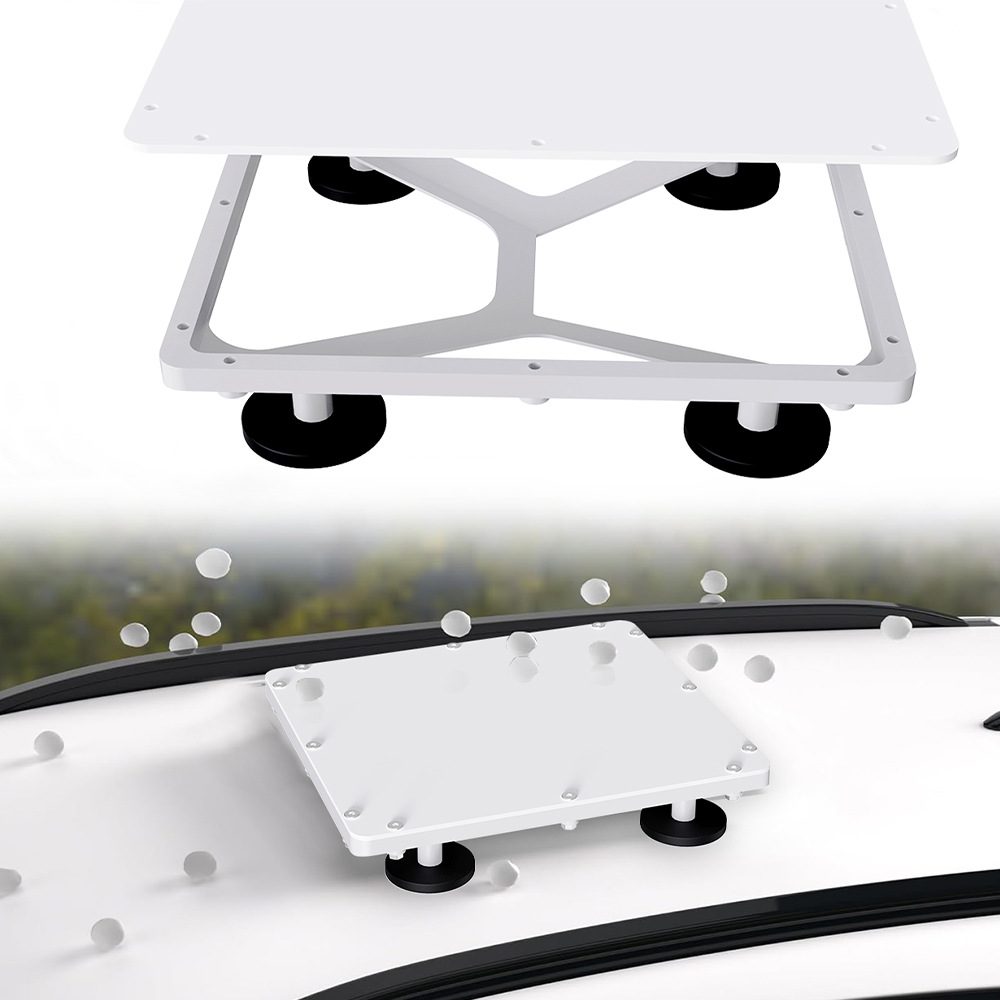
MagMount Pro — Magnetic Car Roof Mount
Neodymium magnets · 3 mm silicone pad · Adjustable tilt · 10-min install
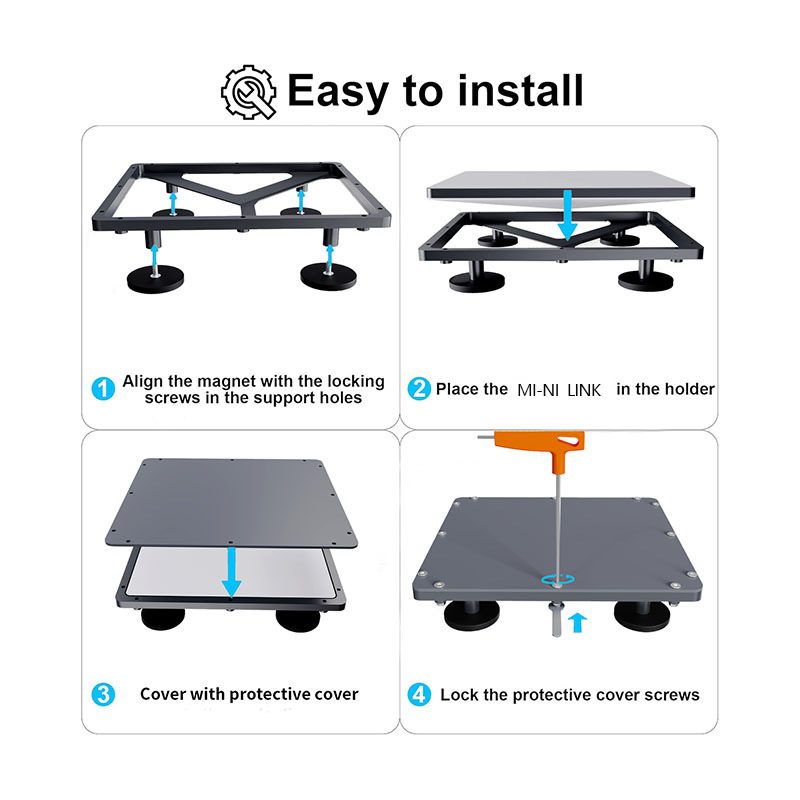
View Product →Step-by-Step: Mounting Starlink Mini on Your Car Roof
The whole process takes about 10 minutes. You'll need no tools beyond your hands.
-
1Clean the roof surface
Wipe the mounting area with a dry cloth to remove dust, grit or water. The silicone pad bonds best on a clean, dry surface. Avoid areas directly above roof bars or sunroof frames.
-
2Attach the MagMount base plate
Place the magnetic base plate on the roof. You'll feel the strong pull — position it near the rear of the roof for the best sky view angle and lowest aerodynamic noise. Press firmly for 5 seconds.
-
3Clip the dish onto the mount arm
Slide the Starlink Mini into the mount's dish bracket. Adjust the tilt angle (0–30°) so the dish faces as directly upward as possible. For driving, a flat/0° position works fine — the dish actively steers its beam electronically.
-
4Route the cable through the door seal
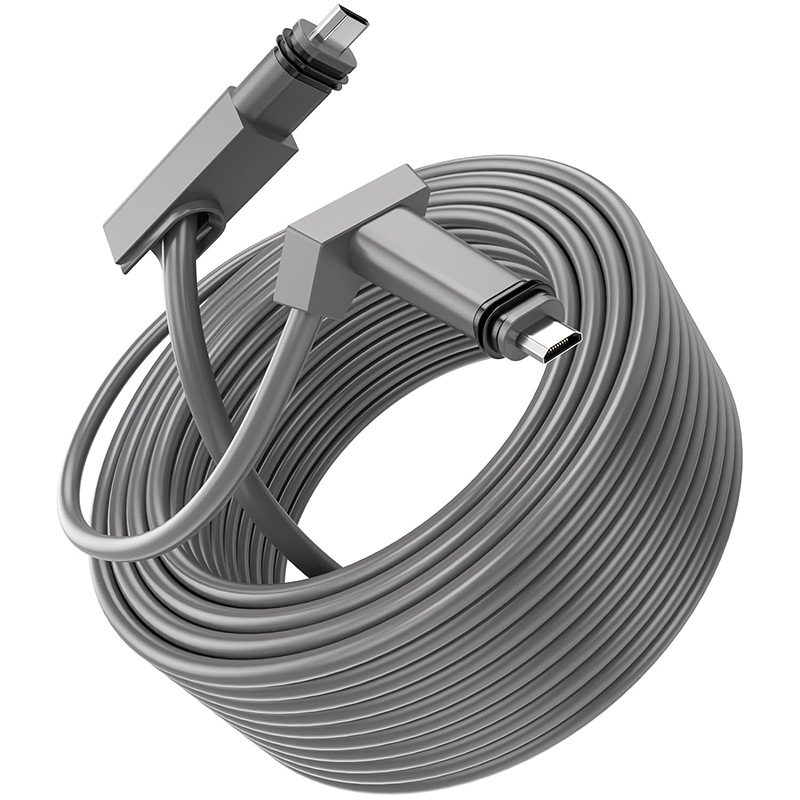
Run the Starlink Mini cable down the A-pillar. Tuck it under the rubber door seal at the top corner — the 8 mm cable fits without damaging the seal. Use the included cable clips to keep it flush with the pillar trim.
-
5Connect the cable to the router
The Starlink Mini has a combined power/data cable with a proprietary connector. Plug this into the Mini router, which you can place in the footwell or glovebox. The router's WiFi signal covers the car interior easily.
Left to right: adjusting tilt arm, cable routing along A-pillar, completed installation with dish on roof.
Step-by-Step: Powering Starlink Mini from Your 12V Car Socket
This is where most people get stuck. Starlink Mini requires 25–30V DC — not the 12V your car provides. The PowerRover adapter handles the voltage conversion seamlessly.
The PowerRover's digital display shows input voltage, output voltage, and current draw in real time.
-
1Check your vehicle's cigarette lighter fuse
Most cars have a 10–15A fuse on the accessory socket. The Starlink Mini draws about 2–3A at 30V (60–90W peak), so a 10A socket is sufficient. If your socket is switched off with the ignition, you'll need to keep the engine running or find a permanent live socket.
-
2Plug in the PowerRover adapter
Insert the PowerRover into your cigarette lighter socket. The digital display will show your vehicle's input voltage (should be 12.5–14.5V when engine is running). Press the power button to start the voltage step-up.
-
3Connect to the Starlink Mini router
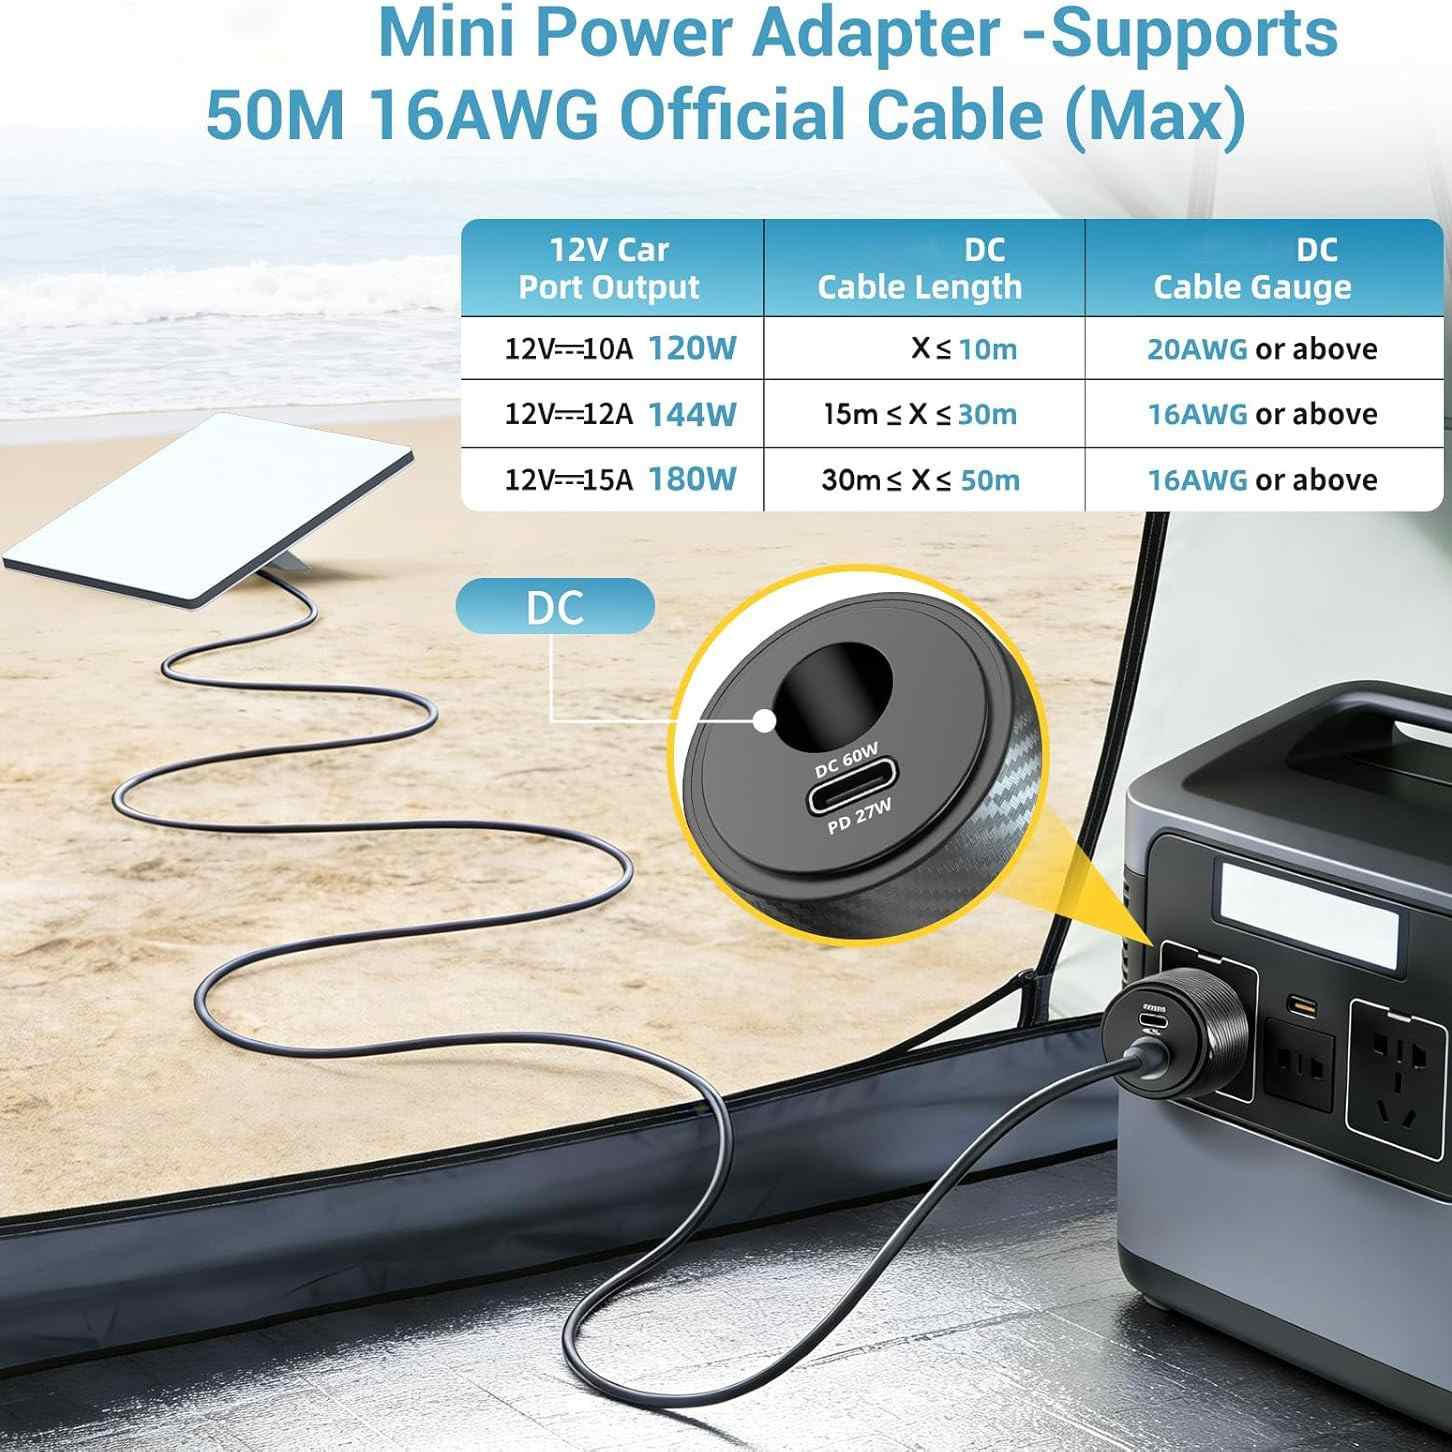
The PowerRover includes a DC barrel connector cable that plugs directly into the Starlink Mini router's power input. The display will show 30V output and around 2A draw once the dish starts up.
-
4Wait 2–4 minutes for satellite acquisition
The Mini's LED will pulse white while it searches for satellites, then turn solid white when connected. On first use this can take up to 5 minutes. Subsequent startups are typically under 2 minutes.
Left: PowerRover plugged in, engine running. Right: digital display confirms 30V output and 2.1A draw.
PowerRover 3-in-1 — Car DC Power Adapter
12V/24V input → 30V output · Digital display · 90W max · Works with all Starlink Mini versions
View Product →Video Walkthrough
Watch the full installation from start to finish. This 8-minute video covers both the magnetic mount and power adapter, plus a live speed test at 110 km/h on the motorway.
Real-World Performance & Speed Test Results
We tested the Starlink Mini + MagMount Pro setup across three countries (Germany, Spain, and France) in May 2026. All tests were run while driving at 100–120 km/h on motorways.
| Location / Road Type | Download (Mbps) | Upload (Mbps) | Latency (ms) |
|---|---|---|---|
| Germany — A9 Autobahn | 142 | 18 | 38 |
| Spain — AP-7 Motorway | 118 | 14 | 42 |
| France — A6 (Lyon–Paris) | 97 | 11 | 51 |
| Tunnel / Underpass | No signal | No signal | No signal |
| Parked, clear sky | 210 | 26 | 28 |
The Starlink Mini handled sustained video calls at 100+ km/h without drop-outs on open roads. Performance dips during lane changes under overpasses (1–2 second gaps) but reconnects instantly. Heavy rain reduced speeds by about 20–30% but never caused a full disconnect in our testing.